Wednesday, August 31, 2011

Candy Wrapper Countdown

As promised, today I'm offering you a closer look at the Candy Wrapper Countdown project I featured on the Stampin' Addicts Holiday Mini Blog Hop last weekend. And here it is:

The first thing you should know is that if you click in the above picture, you can get a closer look at all 25 of these beauties.

Last year, when the Candy Wrapper Big Shot die was first introduced, it was more than a little frustrating for more than a few people.  I will admit to being one of them.  But them my good friend Missi told me about a video on Barb Millikin's blog that took all the frustration out of it.  I've made hundreds of these since then and even have shared them at workshops and events.  I love this little box now!  So if you have a fear of them, check out her video on YouTube.

But even so, 25 was a lot to make at once.  Fellow stamp enthusiast, Peggy, left a comment the other day about maybe making just 2 or 3 and then velcroing the tags on to them every few days to reuse the boxes over and over again.  That would be one way of doing it for sure.  But I envisioned this when I came up with the project:

A bowl full of these cute boxes sitting on my coffee table!  So I really needed 25.   I'm just hoping that my boys, 6 and 8, don't destroy the boxes so we can reuse them over and over each year.  Honestly, I haven't filled these yet but I plan to put small treats in some of them and maybe some slips of paper with holiday activities written on them in others.  But I'd love to hear your ideas too so leave a comment with them please (or even just to tell me what you think about the project in general). 

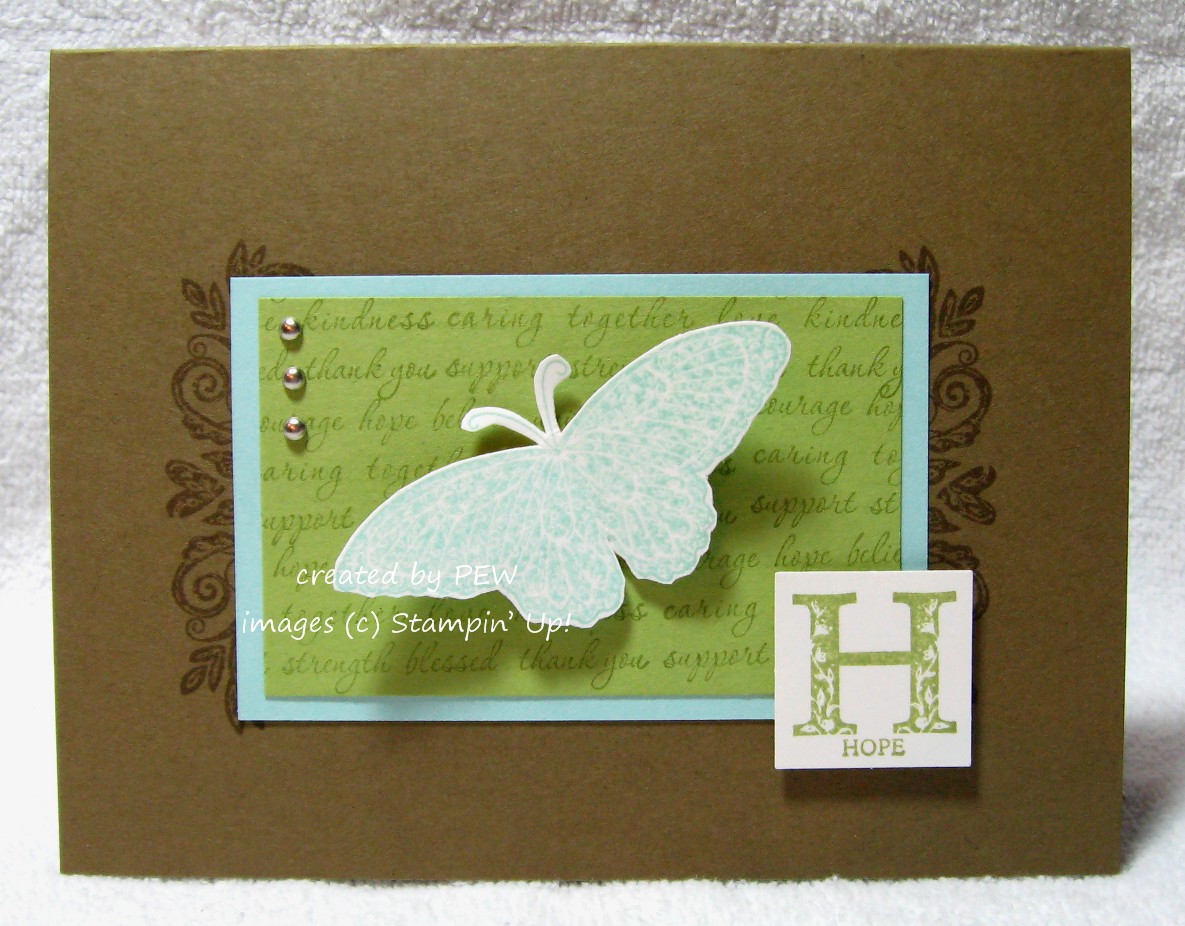
Here are a couple of close up pictures:
I wrapped each of the candy wrapper boxes in a piece of Frostwood Lodge Paper.  Then to some I added ribbon, including the beautiful new Quilted Satin Ribbon from the Holiday Mini,  if it didn't look too busy with the printed papersIt seems like I used ever punch I owned to make the different tags but I listed them all below.

Thanks for stopping by!  Don't forget the Holiday Mini Catalog goes live tomorrow, September 1.  (Woo Hoo!!!!)  Come back on Friday for a look at a couple of cards I made for a Holiday Mini Swap.

Supplies:
Colors: Cherry Cobbler, Early Espresso, Garden Green, Whisper White and Marina Mist
Stamps: 25 and Counting from the 2012 Holiday Mini Catalog
Big Shot: Candy Wrapper Bigz L Die
Punches:  1, 1-1/4", 1-3/8" & Scallop Squares; Postage Stamp, 1", 1-1/4", 1-3/8", Scallop Circles; Medium and Large Ovals
Accessories: Frostwood Lodge Designer Series Paper, Early Espresso Quilted Satin Ribbon, Cherry Cobbler and Marina Mist Scallop Dot Ribbon.

Monday, August 29, 2011

Christmas Countdown Calendar

I hope you enjoyed the Stampin' Addicts Holiday Mini Blog Hop as much as I did.  So many fabulous ideas for the new stamps and other goodies available starting September 1.  I promised to give you a closer look at the Countdown to Christmas Calendar today and here it is:

First of all, thank you for all the nice comments on the calendar.  It was the project I was most excited about. It was one of those projects that I set aside and then picked it up again the next day and liked it even more.  Do you ever do that with projects?  It's a much better feeling than picking it up the next day and NOT liking it.

This picture gives you a little perspective on the size of the calendar.  I knew I wanted to make a small calendar and originally envisioned using a chipboard coaster.  But by a happy coincidence, these metal CD cases were in the same box as my chipboard coasters.  And that is was a light bulb moment.  Stampin' Up had these on the Clearance Rack a year or so ago.  I bought a bunch then, but darn if I don't regret not buying more now that I've discovered this fun use for them. 

One of the brilliant things about using the CD case for it is the ability to store the extra numbers inside the case. What's that?  How are those numbers sticking to the case?

Magnets of course.  You can use any kind of magnet on these, but for economy sake, I used a roll of adhesive magnet strip that you can get at any craft store and cut small pieces to put on the back of each number tag.

I attached the ribbon hanger with glue dots to the inside of the box.  When the box is closed, it holds the ribbon in place too.

I will be offering this as a project at my Christmas Card (and Gift) Crank on November18 and 19 if you want to make one of your own. I know I will be making several as gifts this year.

Colors: Cherry Cobbler, Garden Green, Early Espresso, and Whisper White.  Stamps: 25 and Counting. Punches: Petite Pennant (Tree), Postage Stamp, 1" Square.  Big Shot: Sizzlet Billboard Decorative Strip Alphabet, Scallop Squares Duos.  Accessories: Frostwood Lodge Designer Series Paper, Cherry Cobbler Scallop Dot Ribbon, Garden Green Button, Cherry Cobbler Baker's Twine, Cherry Cobbler Brads.  Other: CD Tin and Magnets.

Friday, August 26, 2011

Stampin' Addicts Holiday Mini Blog Hop!

Welcome to stop 16 on the Stampin' Addicts' Holiday Mini Blog Hop!  I'm so excited to be back in the line up!  If you hopped on over from Betty's Kitty Stamp, I hope you enjoyed her fabulous projects with the new Big Shot die.  But if you are just starting here, don't worry, all the blogs are hooked together in one big loop so you won't miss a thing.

I get to share with you today some projects with the stamp set 25 and Counting.  This fun set features a number from 1-25 incorporated into Christmas-themed images on each stamp -- hence the name.  Its is perfect for all kinds of holiday projects but I am just going to share three with you today:

One of the most obvious use for this set is an Advent or Countdown to Christmas calendar.  The catalog features a beautiful 12x12 calendar, but I wanted to make something a little smaller.  This one was made from a metal CD case.  It is the perfect size for a child's room or maybe your desk at work.  And since the case opens up, you have a place to store all those numbers when they aren't being used.  Fun stuff!  It also features the Frostwood Lodge Paper and the new 1" square punch which coordinates perfectly with the stamp set.  I'll have more information about how I made this cutie on Monday so be sure to come back.

Here I used the stamps to adorn 25 boxes (made with our exclusive Candy Wrapper Big Shot Die).  Each box has some kind of treat in it and my boys will get to open one every day from December 1 - December 25.  Still a count down to the Holiday, but this time your loved one gets a little something for each day.  If you didn't want to put a treat in it, you could also put a slip of paper with a Holiday Activity on it that you could do each day.   It would also work really well for the 12 Days of Christmas.  I had a really, really hard time getting a great picture of these so I hope you can at least get the idea.  I'll share more details and some close up pictures on Wednesday of next week.

And last, but certainly not least, Bingo Cards!  I read this idea somewhere on the 'net but I couldn't find it again so kudos to who suggested it.  The images on each of these stamps are less than 1" square so they fit perfectly in the Bingo Card Background Stamp.  And the fun thing about this, is you can call out the numbers like traditional bingo B-2 or O-21.  My oldest has already asked if we can play Bingo this Christmas.

Thanks for stopping by and be sure to come back Monday and Wednesday for a closer look at the projects.  Now you can hop on over to Trina's Stamp and Whiskers to see one of my favorite stamp sets from the Holiday Mini: Fun and Festive or hop on  over to Stampin' Addicts for a complete list of participating blogs and to chat it up! Happy Hopping!


Wednesday, August 24, 2011

In Color Baby Cards

I set out last week to make some baby cards for my next Stampin' Buffet.  I try to either offer a unisex card, or offer the option for a boy card and a girl card.  But I also wanted to try colors less tradition than the typical Bashful Blue and Pretty in Pink.

With all that in mind, this is what I came up with:
Colors: Wisteria Wonder/Island Indigo, Lucky Limeade and Very Vanilla.  Stamps: Baby Bundle. Big Shot: Scallop Circle #2 and 3" Circle Dies, Polka Dot Embossing Folder.  Punches: Modern Label and Word Window.  Accessories: Brads, Paper Piercer and Mat Pack.
My love for the new In Colors has been publicly declared many, many times.  They are my go-to colors right now.  What do you think?  Do they work for a baby card?

And don't forget to come back on Friday for the Stampin' Addicts' HOliday Mini Blog Hop! I'll see you then!

Monday, August 22, 2011

Holiday Mini Sneak Peeks: Frostwood Loge Suite

It's the most wonderful time of the year!!!  And no, I'm not talking about Christmas.  School starts today for my two boys and I'm so excited to have some structure back in our lives.

More happy news:  the Stampin' Addicts' 2011 Holiday Mini Catalog Blog Hop is coming this weekend!!  Starting Friday, twenty very talented stampers will share fabulous projects featuring lots of new products from the Holiday Mini.  And drum roll please . . . for the first time in two years, I am back in the line up!  I'm so excited to show off one of the fun new sets called 25 & Counting, but you'll have to come back on Friday to see that.

However, I won't make you wait until Friday for your weekly sneak peek.  Today, I'm sharing two cards  made with the Frostwood Lodge Product Suite.  One of the best parts of Convention is the Prize Patrol.  When they posted this particular prize I told my friend Angie that I knew I was going to win it because I didn't really want it.  Sure enough, I did!  But free rubbah and papah is always the best kind so I am not complaining.

Because this is not my favorite I had a little trouble creating with it.  Don't get me wrong, it is beautiful.   It just isn't my particular style.  But one of the great things about Stampin' Up is they offer something for everyone.  I'm sure there are many, many others who think this paper and stamp set are the best thing since sliced bread and I hope you are one of them.
Colors: Cherry Cobbler, Early Espresso, Green Galore, Whisper White. Stamps: Christmas Lodge.  Accessories: Basic Rhinestone Jewels, Frostwood Lodge Designer Series Paper.


The Christmas Lodge Stamp Set Features six stamps including this beautiful tree and greeting.  I kept the card simple and just added some wood grain paper from the Frostwood Lodge pack and used our fabulous self-stick rhinestones as ornaments on the tree.  I used my markers to ink the greeting.  And for the first time in a very long time, I got out the sewing machine to add a some stitching.
Colors: Garden Green, Cherry Cobbler, Whisper White.  Stamps: Warmest Wishes Hostess Set, Well Worn Background. Big Shot: Square Lattice Embossing Folder. Accessories: Regal Designer Buttons, Baker's Twine and Frostwood Lodge Designer Series Paper
This "quilt" card was inspired by a swap I received at convention.  The many plaid patterns in the Frostwood Lodge paper remind me of a country quilt so I knew it would be perfect for this kind of card.  After I cut the squares and triangles, I pieced it together in a star pattern on a piece of whisper white card stock.  Then I ran that through the Square Lattice Embossing Folder to give it a "quilted" look and feel. It's a little hard to tell from the picture, but I also stitched the quilt pattern down with my sewing machine too.  The greeting for this card is from the hostess set that will be in the mini catalog.

I also used this suite to make a swap card and will have that to show you next week.  So what do you think of the Frostwood Lodge Suite?  Is it your style? 

Friday, August 19, 2011

How a Sketch Challenge is Born

Coming up with a new sketch challenge for Stampin' Addicts isn't always easy.  After posting 106 of them, sometimes it seems like there are no new sketches in the world. But I look for inspiration constantly.  Sometimes it comes from a Stampin' Up publication.  Sometimes from the idea boards at convention or a swap I received. 

And sometimes, like this week, it comes from me just sitting at my desk stamping and putting pieces together until something clicks.  That's what happened this week.  I wanted to make a card that featured the Strength & Hope Campaign set.  Each time this stamp set is purchased, Stampin' Up! Donates $2 to the Breast Cancer Research Foundation.  It's a beautiful set and it's only available through the end of August.  This is what I came up with:

Colors: Soft Suede, Pool Party, Pear Pizazz.  Stamps: Strength and Hope.  Punches: 1" Square Punch.  Accessories: Mini Brads, Paper Piercer, Mat Pack.
It seemed a little too basic for a sketch challenge at first.  But then I thought, what if I included the flourishes as part of the challenge, but not necessarily as flourishes.  So I made another card based on the same layout:
Colors: Calypso Coral, Lucky Limeade.  Stamps: Best of Everything.  Punch: Decorative Label.  Accessories: Lucky Limeade Ruffled Ribbon & Designer Printed Brad, Filigree Designer Brad, Paper Piercer and Mat Pack.
Can you see the same sketch in both cards?  One of the things I love about a sketch challenge is that you can substitute slightly different shapes to give cards a whole new look.  In this one, I used the Decorative Label Punch to "bracket" the main piece where the flourishes were in the first card. 

The next step to posting the challenge is to sketch it out in My Digital Studio.  This is the actual sketch that was posted for yesterday's challenge on Stampin' Addicts:

I'd love to see what you come up for this sketch.  Head on over to Stampin' Addicts and play along.  And if you see a card or create one yourself that would make a great sketch challenge, please send the idea my way. 

Wednesday, August 17, 2011

Inlaid Embossing Techinque

I'm not entirely sure who discovered this fun technique or even when it first became hot.   The technique involves adhering shapes to the background and then running it through the Big Shot with an embossing folder.  I have most frequently seen this done with the Square Lattice Folder and flowers and it never really inspired me.

Then I was looking through a friend's swaps at convention and came across an inlaid embossed card that would have knocked my socks off if I had been wearing them at the time.  I don't know who to credit because I did not write down who created it.  But I knew I had to create my own version of it and this is it:

Colors: Island Indigo, Pool Party, Basic Black, Whisper White. Stamps: Easy Events and Happiest Birthday Wishes Hostess Set. Big Shot: Lattice Embossing Folder, #2 Circle Die.  Punches: 1/2", 3/4", 1", 1-1/4" and 1-3/4" Circles, 2-3/8" Scallop Circle.  Accessories: Markers, Aqua Painter, Dazzling Details, Crystal Effects, Basic Black Scallop Dot Ribbon.

I copied the colors and using the circle punches to create the background but I used different images and embellishments.  First of all, I love these colors together.  Second of all, I love the way the circles looked embossed into the background.  So thanks to whoever it was that created the card. (And if you recognize it, please post in the comment section so I can give proper credit).

For the cupcake, I used my markers to color along the lines.  Then I took the Aqua Painter water colored over it. Then I added Dazzling Details to the frosting and Crystal Effects to the cake plate.

But this was the same day I was in the juice.  So when I finished that card, I had another idea:
Colors: Lucky Limeade, Basic Black and Whisper White.  Stamps: Happiest Birthday Wishes Hostess Set. Big Shot: Square Lattice Embossing Folder.  Punches: Itty Bitty Shape Pack, 1/2", 3/4" 1" & 1-1/4" Circles. Accessories: Basic Black Grosgrain Ribbon, Markers, Designer Printed Brads
Love Limeade with Black and White too!  If you look really, really close, you might notice that the embossing is opposite on both my cards.  I get asked all the time which side of the lattice embossing folder is the top. The catalog shows that the "+" should be pressed into the card stock making a lattice mark on top.  But for inlaid embossing, I think the opposite way looks better. 

One of these cards will be featured at my September Card Buffet.  Vote for you favorite in the comment section below so I can decide which one.

Tuesday, August 16, 2011

Still in love with My Digital Studio

I can't believe I haven't posted a My Digital Studio creation this month.  I originally envisioned sharing at least one project plus a tip or two a week, but I've had so many hand stamped projects to share I haven't had a chance.  So I'm squeezing one in on a random Tuesday.

Created in My Digital Studio.  Colors: Soft Suede, Pear Pizazz, Pool Party, Very Vanilla.  Stamps: Kindred Spirits, Baroque Motifs.   Punches: Scallop Square, Modern Label, Square.  Accessories: Grosgrain Knot, Antique Brads.
This is my mom (right) with her two sisters at my house last March. My mom and the middle sister both live in California and the youngest sister lives here in Utah.  It was very unusual for them all to be here together at the same time so a picture was definitely in order.

Now for the My Digital Studio tip:  Included with My Digital Studio is a Square Scallop punch.  You can resize all the punches any size without distorting it.  But when you enlarge the scallop punch, the scallops get bigger too.  Like this:


This would have been just fine, but it just wasn't what I wanted for this project.  I wanted my scallops smaller and tighter together.  So I took eight square scallop punches and lined them up three across and three down to make a square frame.  I didn't worry about the middle because it was the bottom mat for the pictures.  Here I colored every other scalloped square Pool Party so you can get a better idea how it was put together (it's also easier to line them up if they aren't the same color):


And here is what it looked like when they are all the same color before I added the picture on top:


I wanted some dimension so I grouped them together and added the drop shadow to the whole thing. Almost all the seams (and the hole in the middle) disappeared when I put the Pool Party mat over it.
There was one seam that you could see (only because of the drop shadow) so I put the modern label punch over it to hide it. Easy Peesy.

Would you like to see more MDS tips here on my blog?  Let me know by leaving a comment below.


Monday, August 15, 2011

Holiday Mini Sneak Peeks: Spice Cake Product Suite

Really not trying to rush us through the last month of summer, but I love Fall!  I love that first crisp morning and pumpkins and falling leaves and I could go on all day.

And this year, Stampin' Up's fall suite in the Holiday Mini is adding to my excitement for the season.  It's called Spice Cake and it is just as yummy as it sounds.  Featuring the most beautiful Designer Series Paper ever, a beautiful leaf stamp set as well as fabric and buttons, it is just perfect for Fall or anytime really.  And if digital crafting is more you speed, the paper will be available as a digital download too.  Here is your sneak peek:

Colors: Soft Suede, More Mustard, and Very Vanilla. Stamps: Gently Falling and Fabulous Phrases. Punches: Small Oval and 2-1/2" Circle.  Accessories: Spice Cake Designer Series Paper, Soft Suede Taffeta Ribbon, Log Cabin Smooch Spritz.
Remember last week, I promised one more card based on the sketch challenge?  Here it is.  Last week I was on a big Soft Suede kick.  Especially when I discovered how cool the Log Cabin Smooch Spritz looks on it.  You can't tell from the picture, but it gives it just a hint of coppery shimmer.  The Gently Falling set is designed for two-step stamping.  Six outline stamps are complimented by six "filler" stamps in all of the common leaf shapes plus an acorn and a maple seed pod.  I have a thing for leaf stamps, and I adore this one.
Colors: Pool Party, Soft Suede, More Mustard, River Rock.  Big Shot: Scallop Square Duo, Alphabet Simple Letters. Punch: 2-3/8" Scallop Circle.  Accessories: Spice Cake Designer Series Paper, Fabric and Buttons, 1/8" Very Vanilla Taffeta Ribbon.
I love to create banners, but I hate to take pictures of them.  They never look as good in the picture as they do in real life.  So you'll have to use your imagination a bit.  This also features the Spice Cake Designer Series Paper as well as the matching fabric and buttons.  I made this to hang in the entry way to my house, but it has already been requested as a buffet project for September.

Colors: Pool Party, Soft Suede, Very Vanilla.  Stamps: Delightful Dozen. Punches: Postage Stamp and 1" Square Punch.  Accessories: Spice Cake Designer Series Paper, Very Vanilla Seam Binding.

I mentioned before that this paper was really good for anytime and here's the card that proves it.  Anyone who knows me, knows that I love paisleys.  And when I saw this paper I just wanted to hoard it and pet it and call it George.  But I made myself cut into it.  (I can order another package of paper after all.)  I thought it was pretty enough that it didn't need too much so I kept it very simple.  But did you notice the 1" square punch?  Finally we have one and it layers perfectly with the postage stamp punch too.

The Spice Cake Product suite will be available to order starting September 1 when the Holiday Mini begins.  I know you will love it as much as I do.

Friday, August 12, 2011

A Dizzy Turtle

After I made my crayon-resist card the other day, I still needed a sketch challenge for the week. Or did I? Actually, my crayon-resist card became the Sketch Challenge for this week on Stampin' Addicts.  And by coincidence, it also met the requirements for this week's Accessories and More Challenge (use the new Pennant Die).

I could have stopped right there and called it good.  But I was in the juice on Wednesday.  So I made not one, but two more cards based on the sketch.  You  only get to see one today, but the other one will appear with some sneak peeks next week.
Colors: Wild Wasabi, Peach Parfait, Daffodil Delight, Baja Breeze.  Stamps: Turtle & Co. Big Shot: Polka Dot Embossing Folder, Perfect Pennants Die, Circle #2 Die.  Punch: Word Window. Accessories: Daffodil Delight 1/4" Grosgrain Ribbon, Many Marvelous Markers, Crystal Effects, Just Add Cake Designer Series Paper.

"Hope you're back on your feet again soon!"  Get it?  I made this for a dear friend who is undergoing chemo right now.

And since I was still in the juice, as soon as I made this card, a big bright light bulb went off.  That turtle needs to spin so it can land on it's feet again.  I happen to really, really, really love spinner cards and this turtle needed to be on one for sure!

Colors: Wild Wasabi, Peach Parfait, Daffodil Delight, Baja Breeze.  Stamps: Turtle & Co. and Confetti.   Big Shot: Circle #2 Die.  Punch: Word Window, Modern Label, 2-3/8" Scallop. Accessories: Many Marvelous Markers, Crystal Effects, Just Add Cake Designer Series Paper, paper piercer, mini brads.
 You know you want to see it move.  Right?  I can play with these cards for hours.


(That's the very first video I've ever made and uploaded all by myself.  I can't believe it worked!)


I love this turtle. He's this year's Making a Difference set called Turtle & Co. When you purchase this set, Stampin' Up! donates $3 to the Ronald McDonald House Charities.   Such a great cause!  And he makes perfect get well and other cards for the young and not-so young men in your lives (and he has cute little friends too - a snail and frog). 

And besides the challenges over on Stampin' Addicts, these cards also fit the theme of the monthly contest over on soshelli.com.  So they are my entries for this month.  Cross your fingers for me.

Wednesday, August 10, 2011

Fabulous Creative Elements


I set out the other day to make a list of the top 10 things in the new Idea Book and Catalog.  The problem was, I couldn't stop at 10.  So much to love in this one.

But one of my favorite stamp sets from the new catalog is Creative Elements.  You know how you can tell I think it's fabulous?  I've made two cards with it in the last week and both times I reached for the "fabulous" stamp to compete the card.  I didn't even realize it until I went to take pictures of them both last night.

I mentioned one perk of being a demonstrator yesterday.  Another one is Convention.  This card is a CASE of a card presented by Stampin' Up Founder and CEO Shelli Gardner and her daughter Shalae Brown on the main stage at Convention last month.  I think it was my favorite of all the projects presented on stage during Convention and I knew I had to try it at home.

This card features all kinds of techniques.  First, emboss resist: I stamped the flourishes in VersaMark and used clear embossing powder then I stamped and sponged over it and rubbed away the excess ink over the embossing.  Then I ran the whole thing through the Big Shot with the embossing folder and lightly sponged Razzleberry mostly just on the bumps.  Then I spritzed it with a combination of shimmer paint and alcohol to give it some shine. It was a little work, but worth the effort.
This set really lends itself well to techniques. This time, I wanted to plan a project for my Technique Hostess Club called Crayon Resist.  I stamped the glossy white card stock with StazOn black ink.  Then I stole, I mean borrowed, a white crayon from my kid's crayon box, and colored in all the places I wanted to stay white.  Then I sponged Pool Party Ink all over that piece.  Last, I rubbed away the crayon.  I think this was one of the very first techniques I ever did at one of the first Stampin' Up Workshops I went to, way back before I ever intended to become a stamper.  It's an oldie, but a goody.  Love how elegant it looks with this technique.

Colors: Wisteria Wonder, Concord Crush and Whisper White.  Stamps: Creative Elements. Punches: Decorative Label and Lace Ribbon Border.  Accessories: Rhinestones

And last, but not least, is a card from my customer appreciation event.  No techniques on this one, but some new things to point out.  Concord Crush is one of the carry-over In Colors from last year.  I hardly ever used it because I just had a hard time pairing it with anything other than white or vanilla.  But I love it with Wisteria Wonder.  It's like they were made for each other.  I especially love Wisteria Wonder Card Stock stamped with Concord Crush ink.

The other new thing I love on this card is the Lace Ribbon Border.  It's one very large punch.  But it is so beautiful.  Look at all the detail in it. It really adds to a card.

Now tell me Creative Elements is not one of YOUR favorites from the new catalog.   If you want it for yourself, click on over to my online store and order it.  The set of 8 stamps in wood mount (item 122645) is $32.95 and in clear mount (item 122647) is $24.95. 

Tuesday, August 9, 2011

Ellen on Glitter

Someone asked so I have to share.  Here is Ellen on Glitter:

Monday, August 8, 2011

Holiday Mini Sneak Peeks: Fun and Festive

The Holiday Mini doesn't start until September 1.  But one of the perks of being a Stampin' Up! Demonstrator is the opportunity to pre-order new items and get to play with them a whole month before everyone else.  (And that's just one of the many perks).

My order arrived last week and I promised to provide some sneak peeks.  I'm hoping to do this once a week for the rest of the month.  This week's sneak peek is the Fun and Festive set.  The set features three stamps, one for each upcoming holiday: Halloween, Christmas and Valentines.  I knew when I saw it, I'd have to have it.

Colors: Pumpkin Pie, Lucky Limeade, Perfect Plum, Daffodil Delight, Whisper White and Basic Black.  Stamps: Fun and Festive. Tools: Many Marvelous Markers, and Small Oval Punch. Accessories:  Basic Black 1/2" Scallop Dot Ribbon, Dazzling Details, and Crystal Effects.  Tutorial for Pull-Up Candy Bar Holder from splitcoaststampers.com.
If you love sparkle, but hate glitter (don't forget what Ellen DeGeneres says about glitter), you will love the other new product featured on this project: Dazzling Details - an iridescent glitter glue.   All the bling with none of the mess.  After I colored the image, I added a layer just over the colored areas to give it lots of sparkle (I know it's a little hard to tell from the picture).

And isn't this Candy Bar Holder a great Halloween treat?  This may  be a project for my Spooktacular Buffet in October.  If you are a class regular or want to be, let me know and I'll add it to the lineup.

Colors: Garden Green, Cherry Cobbler and Whisper White. Stamps: Festive and Fun.  Tools: Spritzer and Marker. Accessories: Frostwood Lodge Designer Series Paper, Cherry Cobbler Seam Binding Ribbon, Garden Green Button, and Crystal Effects. 

The Christmas image says, "Have a Holly Jolly Christmas."  Tell me that song is not running through your head right now!  This time, instead of sparkle, I wanted shine so I just put a layer of Crystal Effects over just where I colored.  That is one of my favorite techniques, but sometimes I have a little trouble being patient enough for it to dry.

Colors: Cherry Cobbler, Regal Rose, Very Vanilla, Pink Pirouette, Pretty in Pink.  Stamps: Fun and Festive.  Big Shot: Perfect Polka Dots Embossing Folder.  Tools: Markers, Paper Piercer and Mat Pack.  Accessories: Dazzling Details, brads.

I know, Valentines is still six months away.  Seems a little silly to be showing you a card this early.  But I love this stamp.  It's so cute.  I also used it in a swap I am doing so I'll have another card using this same stamp set to show you in a few weeks.  Again, I just added just a touch of Dazzling Details to this one too. 

I've been so drawn to these line art images lately. I know some of my customers HATE to color images.  But I have always found it a bit therapeutic to color.  It takes me back to my childhood days of coloring books and crayons.  I used to beg my mom to buy me markers and the thicker-paged books.  Simpler times.   Now I have my very own set of markers and can stamp all the images I want to color anytime I want.  Heaven, I tell you!

Friday, August 5, 2011

Stampin' Addict Sketch Challenge 104 & Color Challenge 108

I have A LOT of nicknames.  In my younger years I was also Paula Koala, PJ, and PaulaJo.  And because Californians tend to shorten everything (rad, bromance, vaca, Cali to name just a few famous terms) I was even just Jo for awhile.  Now I'm mostly just Mom, Paula, Pahlua (because I misstamped my name once and it stuck) or my online name, scrapshappen.

But I have another name not very many people know about: Challenge Master. When Stampin' Addicts first got started I took on coordinating the Challenges.  We have six every week: Monday's 3D challenge (with awesome video tutorials), Tuesday's Techniques, Wednesday's Accessories and More, Thursday's Sketch, Friday's Colors and Saturday's Scrapbooking.  If you are ever in need of some inspiration, be sure to check it out: www.stampinaddicts.com.

I've mentioned before that I host the Sketch Challenge and then a group of very talented stampers do the rest.   This week's challenge came straight off of page 104 of the Idea Book and Catalog. (Coincidentally, it is also Sketch Challenge 104).  One of the things I love about our catalog is it really has some great inspiration for creating at home -- substituting other stamps and colors for those shown. 


So here is the card I made based on the sketch for this week:

Colors: Early Espresso, Melon Mambo, Pumpkin Pie and So Saffron.  Stamps: Daring Adventure. Accessories: Brads, Markers, Spritzing Tool.


I love the saying on this stamp set.  It makes me want to be brave and go climb a mountain or something. But after I made this card, I had an idea for another one:

Colors: Island Indigo, Calypso Coral, Pool Party, Lucky Limeade. Stamps: Delightful Dozen. Accessories: Designer Printed Brads, 3/8" Ruffled Ribbon. 
Notice how the cards have the same sketch but the one on the bottom is flipped up so it looks completely different.  It was a happy accident actually.  But I was very pleased with the way it turned out.  (Sorry the Pool party ink didn't show up well in the picture, it looks much better IRL).

And because our usual color challenge hostess Crissy is vacationing with her family, I repurposed this card to be the color challenge this week too. That's color challenge 108 if you'd like to play along too.  Have I mentioned how much I LOVE the new colors?  I have?  Oh, sorry. Use them and you will too.  I promise.

So head on over to Stampin' Addicts and check it out!  You won't be sorry.

Wednesday, August 3, 2011

Nobody Faint!

I know.  Shocking.  Two times in one week.  We might even make it three if I'm lucky.

Seems like every year at this time, I start thinking about my kids going back to school.  And I start thinking about all the free time I'm going to have once they are safely occupied at their institutions of lower learning.  And then I start making plans and goals as to how to spend that free time.  And every year I say I'm going to spend some of it here, on my blog. And every year the shiny squirrels with their disco balls interfere.

Well friends, this is the year.  My youngest son is starting FIRST GRADE!!!! No more stopping the stampin' mojo at 11:30 to feed the boy and get him to school on time. Soon I will have blissful quiet all day long and can stamp and blog to my hearts content!  Can you hear the party music playing?  So this time, I really, really, really mean it.  At least until the next shiny squirrel appears.

Lest you think I'm totally heartless.  I am sad that my kids are growing up.  It happens in the blink of an eye.  But I am totally psyched to have them both in full day school now too.  Can they just stay 6 and 8 forever?

Now on to the project you came to see:
Colors: Crumb Cake, Pretty in Pink, Very Vanilla and Chocolate Chip. Stamps: Pennant Parade and Happiest Birthday Wishes. Punches: Cupcake and Petite Pennants Builder Punches.  Accessories: Scalloped Dot Chocolate Chip ribbon, Red Glitter Paper.  Big Shot: Perfect Polka Dots Impressions Folder.
You might recall that last year's Summer mini featured a really cute ice cream set.  Several of my customers were disappointed that it didn't carry over to the big catalog.  Now we have something even better: PUNCHES THAT MAKE ICE CREAM CONES!!!! It's like a gift from the stampin' gods.

To make your very own ice cream cone cards or scrapbook page, you will need the Cupcake Builder Punch (carried over from the Occasions Mini Catalog) and the brand new Petite Pennants Builder Punch.  The Pennant Parade stamp set is a nice addition too because it gives you that waffle cone look.  (Watch for more ideas using this set and punch coming soon).

And check out that new 1/2" Scalloped Dot Ribbon.  It has a grosgrain finish to it, but it is extra soft and easy to tie. It comes in 10 different colors too.  Almost as yummy as ice cream cones.

Monday, August 1, 2011

A New Look. A New Month. And a New Resolve!

I spent the better part of today playing with My Digital Studio to create this fun background and header for my blog.  Have I mentioned lately how much I love My Digital Studio?  I was really afraid it would be difficult, but it turned out to be a lot easier than I expected.  It helps that blogger has vastly improved it's user interface too.

The fun kit that I used is the Noteworthy Digital Content CD, exclusively available as a hostess item.  It has 12 different Designer Series Papers, 25 embellishments and 36 stamp images.  If you want a copy for yourself, ask me about how to earn it for free.  It features my favorite of the 2011-2013 In Colors: Pool Party, (But I reserve the right to change my mind about the favorite thing.  Really I love them all!) as well as Cherry Cobbler, So Saffron and Early Espresso.


And since it's the beginning of a new month, of course there is Stampin' Up! news as well.  During the month of August, Stampin' Up is offering lots of customers' favorite promotions: buy three packages of Designer Series Paper and receive a fourth package free!  I don't remember them having this promotion so close to the start of a catalog before -- but I love that!  I ordered mine today.  Don't wait to get yours!  For more information, click on the button on the right for the promotion.  Or click the Shop Now button on the top right.

And finally, a new resolve.  Seems like this blog has become an after thought to me. I only post when I have classes to share.  I have a list of excuses for that, but I know you don't really care about that part. So I am resolving today to make this blog a bigger priority.  I won't promise to post every day or even a certain amount of days each week.  But I will post several times a month.  (How is that for vague?)

I'll kick it off today with last week's Sketch Challenge over on Stampin' Addicts:
Supplies: Just Add Cake Designer Series Paper; Wild Wasabi, Poppy Parade, Whisper White and Baja Breeze Card Stock; Swirls and Curls Verses (from the Summer Mini Catalog); Boho Blossoms Punch and Itty Bitty Shape Punches; Mini Brads

You probably know that I host the sketch challenge over there but like so many other things this summer, it has also fallen through the cracks some weeks.  But I'm promising to be better about that too.  You can check them out and play along here: Stampin' Addict Sketch Challenge Forum.  This particular sketch is number 103.  It's a great way to use some of that Designer Series Paper that is on special this month. :)

Other quick tidbits of news:  I placed my Holiday Mini Catalog preorder this morning so hopefully I'll have some sneak peeks for you soon.  And I've added a new member to my team!  Welcome Sarah Crow!  She took advantage of the $99 starter kit special this weekend.  I'm so excited for her!

So let me know what you think of the new design and let me know what types of things you would like to see posted here!